-
Installing calibration slide
Cut the CALIBRATION slide (15° as function of focal
length
F) slide in the same way as the EMPTY slide (so that it
fits
on the prism).
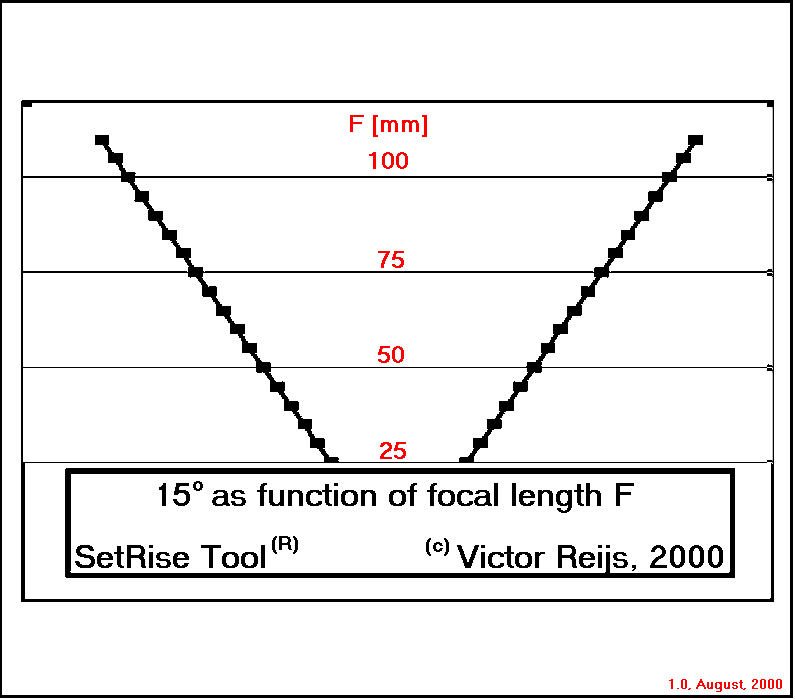
CALIBRATION slide
If you don't have the slide:
print this picture at 208 pixels/cm on acetate
foil.
Put the calibration slide on the prism. Keep the camera upside
down
while attaching the lens. Look through the eye piece (camera still
upside down!). In principle one should see a normal camera view with
the
calibration slide overlaying it.
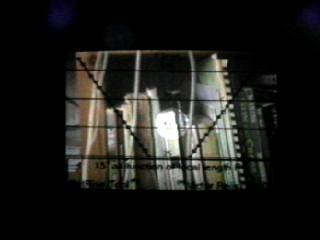
Calibration slide overlaying the normal camera
view
-
Finding a reference object and camera location
We now have to determine a reference object that will have a width
comparable to an 15° angle-of-view from the camera lens. Find
an object with in width of around 3 m (like a window sill, two vertical
poles, part of a house, etc.), and measure its width as accurate as
possible.
The camera lens must be located at: width-of-reference-object * 3.8 [m]
from the reference object. So if the window sill width is 3,05 [m], the
distance of the lens to the window sill must be 11,58 [m] (3,05 * 3.8).
Width:
[m]
the
distance: [m]
-
Checking the focal length of the lens
The reference object must now be viewed through the camera (camera
still upside down). Now position the reference object in such a way in
the camera view that it is just between the two angled lines, while
keep
the distance the same!. One can read now the actual focal length of the
lens from the scale (the red numbers and the additional 5 [mm] blocked
steps).
For using the SetRise Tool® the focal length should
be between 50 and 55 [mm], otherwise you need to get another
SetRise Tool®.